Tuesday, November 6, 2012

Thankful November

What a lovely weekend we had here in the Calef house!

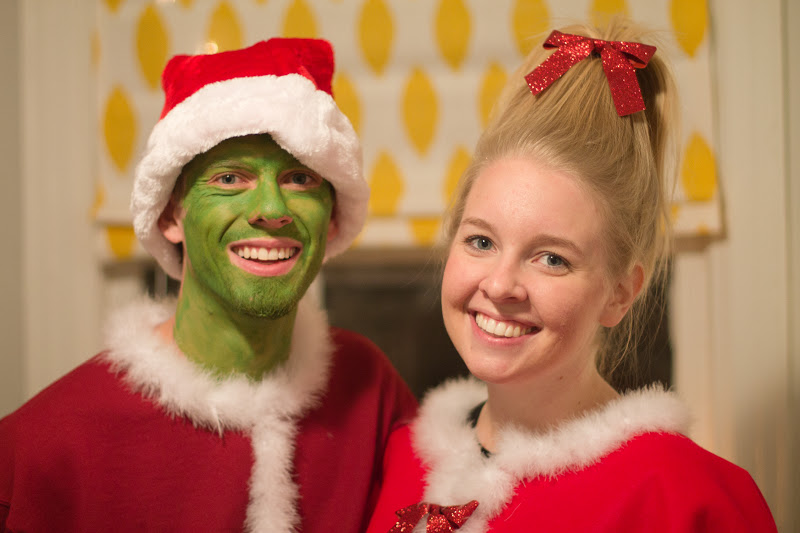
photo shoot with my favorite family


date night

spur of the moment bonfire with friends


and trying out a new church


This weekend I was so thankful for the relationships that I have.  I have a loving husband, great friends, and the opportunity to meet new people and create new relationships.

Today I am thankful for the right to vote.  I know that a lot of people are telling you that today, and they do because it is important.  We live in a democracy where we have the right to elect individuals to public office.  How cool is that?!  People through around the phrase "it is my right" a lot, and not always are they correct, but voting is a right that we need to exercise.  Beyond the fact that it is a right, voting provides me with a high like no other and I always leave wishing the next election would be here tomorrow so I could do it again (minus all of the political campaigns... those can go away).

My goal for the month of November is to write something that I am thankful for everyday.  Some days they will make it on to the blog with a story or lesson that I am learning, other days they will be documented in my prayer journal.  I want to go through this month remembering that God has blessed me in countless ways.  My life is beautiful and there are days when I am trudging through the mundane pieces or the midweek blues and begin to lose sight of that fact.  I hope that through intentionally working towards a thankful attitude I will allow God to transform my heart and see my life the way that He sees it. 

Here is to a Thankful November!


Sunday, November 4, 2012

Halloween Party 2012!

My heart is full and happy and I could write an entire post about it, but for today I am just going to leave you with some fun pictures from our Halloween party.  It was a lovely night of friends, costumes, food, and a toasty fire :) 


Happy Sunday!

Wednesday, October 24, 2012

Pumpkin Lanterns

I wanted to make hanging lanterns for our big tree in the backyard, and originally I thought of using mason jars.  The more I thought about it though, the more I realized that I wanted to make the lanterns be jack o lanterns that were hanging in the trees to be a festive addition to the party.  Because I knew I would be painting the jars, I was a little hesitant to use any of the nice Kerr and Ball mason jars that we had from the wedding (besides most of them are getting used for another project...).  Then I realized how many glass jars I had been saving to use in my craft room as storage for craft supplies, and knew that they could be put to perfect use for our Halloween party.

The project supply list is short and sweet:
-Glass jars (I used empty salsa, spaghetti sauce, and pickle jars)
-Orange acrylic paint
-Black permanent marker
-Wire if you want to hang them

Start by peeling off all of the jar labels and giving them a good clean.


Apply paint to the inside of the jar around the top.


Use a paint brush to spread the paint around the inside of the jar.  I tried using a brush full of paint and then painting the jar, but found the method of applying paint first to be easier.  I also found that tipping the jar upside down helped to reach the hard to get spots on right below the top of the jar.


The nice part of painting the inside is that there is no wait time between painting and drawing on the face ;)  Use a permanent marker and create spooky, scary, or happy faces for your pumpkin lanterns.  And if you run out of ideas search the internet for Jack o Lanterns and get inspiration from the faces others have cut out!


Here is my crew of pumpkin lanterns.  I love that there are different shapes and sizes and the unique look each has from the way the paint dried, the amount of paint used, and the different  faces they all have :)  I am really excited to see them lit up for the party of Friday!


Are you up to any fun holiday crafts right now?

Monday, October 8, 2012

Thrifted Kitchen Counter Table

Happy Monday!  I have a really exciting project to share that the hubby and I completed this weekend. It was a pretty relaxed weekend in the Calef house and on Saturday we stopped by a local flea market to look around.  It is one of our favorite lazy day activities, and since I wasn't feeling super great on Saturday we thought it was the perfect low key activity :)  

Within a minute of walking in I had found the counter height table I had been looking for since we moved into the house!  And it came with two stools that I desperately needed for the craft room so I looked the purchase as a win :)  $60 for all three pieces!


Since I had been looking for it since we moved in I had several inspiration pieces pinned on my Pinterest boards:

I fell in love with this island from World Market back in the spring.  They no longer carry it (sad day!), but as you can tell from the finished project it was my inspiration piece.

This beautiful furniture redo from Juniper Hill Antiques

A pretty dresser repurposed for the kitchen

This pretty island featured in Southern Living
First step was to remove the hardware from the table and proceed to sand and then clean.  After cleaning away all of the dust I sprayed the bottom a beautiful turquoise blue from Valspar.


We wanted the top to have the look of butcher block without the cost so we picked up 5 pieces of $.99 faux wood laminate.  It is the type that you just peel and stick, but we knew it wouldn't adhere the best to the curved edges so I quickly painted the edges with leftover dark brown paint from the hutch remodel.


After the paint dried we stuck the faux wood tiles in place and placed the new table into the kitchen. It brings color and functional counter space to the room :)  


Did you complete any fun DIY projects this weekend?

Wednesday, September 26, 2012

Bathroom Update

Happy Wednesday!  I am back with another room in our house to share where we have come from, what it looks like now, and what our future plans are.  This week is the bathroom, which when we moved in was a very white, but not sterile space :/  There was a single wire pantry shelf above the toilet that served as the only storage option beyond the medicine cabinet and creepy vanity.

Unfortunately I only have two very bad photos of the space before that do not show much detail (hindsight is always 20/20!), but the vanity is old and not a place I would store items beyond cleaning supplies, and the medicine cabinet was also gross with country knobs that were not my style.


The first thing we did was take down the weird wire rack (it got used when we redid our closets) and pulled off the medicine cabinet to replace it.  Someone had used the medicine cabinet to cover up a giant hole in the wall (explains why it was off-center) so we made sure to find a much larger medicine cabinet that would adequately cover the hole and caulked all the way around to create a good seal.  We also changed up the paint color to a beautiful dark grey, hung up towel racks for functionality, replaced the light, and brought in temporary shelving.


The little white cabinet outside of the door serves as more bathroom storage. It holds extra contacts, toilet paper, lotions, and hair care products.


As you can see from this shot of the temporary shelving we need more space for storage... like yesterday.


The new light is a lot brighter which is necessary in a space with only one light, and the medicine cabinet is significantly larger than the previous one.  Yay for more storage!


That is where our bathroom is currently at.  On the list of future improvements in artwork for personality, and white floating shelves that wrap around the wall beside and behind the toilet.  We hope to do two that wrap and one on the very bottom that floats just below the light switch.

Thanks for taking a peak into our bathroom!  I'll be back Friday with an easy recipe!


Monday, September 24, 2012

Fear

Happy Monday!  I had intentions of sharing a quick fruit dip recipe, but I started reading my book and felt guided to share some musings.  Fruit dip recipe can wait a few days ;)

I am currently reading "Making Room for God in Your Hectic Life" by Keri Wyatt Kent.  I bought the book a while ago, but have really started getting in to it this past week and felt so rejuvenated by the topics and encouragement that is part of each chapter.  


The chapter I am currently on is called humble and it is discussing the inner struggle between living simple and honoring God's wishes and living in a race with everyone around us.  It discusses reasons that we feel a pull towards competing with those around us, and one of the biggest is fear.  Lately I have had a strong fear that I have no skills and will graduate with my masters no better than I was before.  I fear never finding a job that I am excited and motivated to go to, and that truly makes a difference in my community.  I look around at the success of friends and classmates, and wonder what I am missing or am doing wrong.

At the time when I needed it God used this book to set my worries straight and encourage me to continue following Him.  God placed me at Missouri State again and he provided me with a graduate assistant position.  I have to trust that he placed me where I am and that he is going to use my education as a catalyst for the future he has planned for me.  I do not need to compare myself to others because God created me to be an individual and he has a specific plan especially for me.  Why would I want someone else's life if it means I miss out on the blessings God has planned for my own?

Matthew 6: 33-34
"But seek first His kingdom and His righteousness, and all these things will be given to you as well.  Therefore do not worry about tomorrow, for tomorrow will worry about itself.  Each day has enough trouble of its own."

Please pray as I work out these fears and work on following God and listening for His voice as he directs my path.  If you are going through something similar let me know!  I would love to pray for you as well :)

Friday, September 21, 2012

Recipe Friday: Red Beans and Rice

It's Friday!!!  I just love the relaxing/ exciting feeling I get on Friday.  I can relax knowing that I have a weekend at home and I get excited about the fun weekend activities we have planned.  This weekend we are working on an outdoor fire pit to replace the one that was stolen from our house this week :/  Hopefully a brick one will prevent them from being able to take it from our yard.

To start the weekend I thought I would share my cheater red beans and rice recipe.  When I met Cameron I quickly learned that his favorite meal EVER is red beans and rice, and my mother in law told me that I would have to learn how to cook it :)  When I first attempted it right after getting married I put in all of the effort of soaking dried beans overnight and spending a couple of hours letting all of the ingredients cook together in a big pot on the stove.  I quickly learned that all of the time put into the meal would not work in our lifestyle and that I needed to fix the recipe to fit into the time I have to devote to dinner.  Here is my quick and easy red beans and rice that still makes my husband happy :)

Ingredients:
*1 can of red beans drained and rinsed
*3 cups of rice (I usually use Uncle Ben's)
*One package of sausage (I've used turkey and kielbasa, but it really depends on what you like)
*6 1/2 cups of chicken broth (or water with chicken bullion cubes if you're in a pinch)
*Creole seasoning
Optional:
*Garlic
*Olive oil

I first heat up olive oil in garlic in my pot, and then add in the rice and stir to make sure the rice is coated in the olive oil.  I toast my rice for 3 to 4 minutes to make sure the garlic flavor is infused.


Once the rice is toasted I add in the chicken broth.  The night I made this I didn't have chicken broth on hand (fixed that grocery shopping this week!) so I just used water and 4 chicken bullion cubes.  Not as good on the sodium front, but it works flavor wise in a pinch :)  You could also use vegetable or beef broth, I just prefer chicken.  The point is to give a flavor for your rice to soak up as it cooks.


Bring the liquid to a boil, then reduce to a simmer and cook covered for 20 minutes.


While the liquid and rice boils I begin prepping the beans and sausage.  Cut the sausage in quarter inch slices and then cook in a pan until they are nice and brown on both sides. 


At this point you may have a cutie puppy intently watching for a falling piece of sausage ;)

 While the pot is boiling also drain and rinse the beans.

With about five minutes left in the cooking time I usually add in the beans and the sausage.  The five minutes helps to warm and soften the beans, and it gives time for all of the flavors to combine.

The final step is to add in the creole seasoning.  There is no right or wrong amount it just depends on how much kick you like to your food.  We like a lot of kick!  Start out with a light sprinkle and add in a little at a time.


Your final result is easy, delicious, and perfect for cool, fall days!


Wednesday, September 19, 2012

Living Room Update... Finally

We have lived in our house for almost 5 months!  I honestly cannot believe it has been that long, and when I look back at pictures of how our house first looked I am blown away.  We have done so much work to make this house our home and I am so proud of it.  I thought about doing an entire house update in one post, but then decided that I would break it up by rooms in order to show more pictures and details and make the fun last longer!

If you want to look back at all of the pictures from when we first moved in here is my initial post.

Our living room when we moved in was dark, dirty, and in need of TLC.  The walls were a dark hunter green, the trim was painted over with dark, muddy brown, the ceiling fan was brass, and the wood floors had seen better days.


We spent two weekends with my amazing in-laws working to paint the house and work on the floors.  They even came back while we were gone on vacation and polyurethaned the floors in the living room and bedrooms!  It was a long process but the end result in the living room is the perfect living space for us :)


We chose the color "Blue Lagoon" by Behr for the walls and LOVE the color as well as the paint.  It took us ONE, yes let me repeat one, coat to cover over the dark hunter green!


The floors look so much better after a good scrub and a coat of polyurethane.  If I was redoing floors in my permanent home I would have sanded, re-stained, and covered the floors with a couple of coats of poly, but this worked great to make the floors look clean, be more durable, and we were able to do all of the floors in the house with one can.


This shelf had a makeover and now acts as my "mantle".  I love it for showcasing sweet mementos during the year, and I am really excited to dress it up for holidays!


The hutch looks so good up against the blue walls!  I love how well all of the bold colors pair with one another in the space.


This is a lamp that we DIY'd out of a fun lampshade I had to have from Target and a pendant light from Home depot :)  It helps to define the "dining" part of the space.


It is hard to see, but behind the door we have a coat rack for purses, school bags, and jackets. You have to get a little crafty when you don't have a coat closet!


We also tackled the ceiling fan during our living room makeover.  It used to be brass, but one day we took it apart (part to paint and mostly to clean) and spray painted all of the metal parts with oil rubbed bronze.  It looks so much classier!


There is the tour of living room!  It has been a long time coming so thank you for being patient :)  There are still blank walls that I would like to have photos on, and I am still on the hunt for the perfect curtains , but it definitely looks and feels much more like home!

Followers