Showing posts with label Home Decor. Show all posts

Wednesday, January 23, 2013

A case of the winter blues

I have a case of the winter blues.  It takes a lot more effort to bring my camera out and catch life when I am not feeling amazing.  Nonetheless here are snapshots from the past few days.


18/365 My sweet baby lounging during family movie time :)


20/365 My favorite ladies and I at the murder mystery party with church.  The theme was Mad Men and it was so fun!


21/365 The new shelves are up in my office and they give me so much space on my desktop!  I also love having a bunch of books lined up filled with topics I love :)  


22/365 Laura and I took a lunch time trip to a local antique mall and I found this tray for $9!  I am going to use it as a magnet message board in my office.


23/365 A few of my great grandmother's handkerchiefs.  I plan to frame a few in our kitchen and bathroom and I cannot wait to have them on display.

Pray for the blues to go away.  I love every one of you!

Sunday, January 13, 2013

Two For One

I am combining yesterday and today's posts into one because in the rush to finish projects I failed to blog photos yesterday.

We have been hard at work making shelves for our living room, bedroom, and spare bedroom (which also houses my office).  Yesterday was rainy and cold here so it was an easy day to stay inside and get work done.

As paint, stain, and wood glue was drying I decided to work on a shadow box of our wedding stationary that I have been meaning to finish for a while.  I found the shadow box for a couple of dollars at a local thrift store and just needed to recover the back panel and attach my items to it.


Putting together brought back so many good memories of our wedding season.  And now I get to look at it every day as it sits on the shelves we finished for our bedroom!  The shelves are made with 1x3 for the back and base and a 1x2 for the front ledge.  We made two four foot long shelves to display pictures and memories in our bedroom.  The whole project cost $5 for lumber plus wood glue.  

Tomorrow we both go back to school which is bittersweet.  I have loved this one on one time as well as the chance to get caught up around the house, but I am also excited to get back to learning about my passion.  

Happy day 13 of 365.  For anyone going back to school tomorrow good luck on this coming semester!

Friday, January 11, 2013

"Do you need any help?"

We took a trip to Lowe's and Home Depot today to get supplies for several house projects that we would like to have completed before school starts on Monday.  While we are at Lowe's we were asked by no less than six employees if we needed any help.  Apparently we looked lost :/  Nonetheless I'm excited to share pictures of the changes in our house!


My hubby also had a pretty bouquet of roses waiting for me when I got home from work and I wanted to share them because I think he's a sweetie ;)


Another fun transformation taking place for some items in our living room!  I finally took the plunge and went purple!


There is the hodge podge of pictures from a really good day 11 of 365 :)

I want to share with all of you again to check out Joy's blog and the story of her foster daughter "Pie" and their journey towards adopting her.  Please pray for her family and if you feel called contribute to their adoption fund.  Even a dollar means a lot to this family as they work towards making "Pie" a permanent member of their family :)

Wednesday, October 24, 2012

Pumpkin Lanterns

I wanted to make hanging lanterns for our big tree in the backyard, and originally I thought of using mason jars.  The more I thought about it though, the more I realized that I wanted to make the lanterns be jack o lanterns that were hanging in the trees to be a festive addition to the party.  Because I knew I would be painting the jars, I was a little hesitant to use any of the nice Kerr and Ball mason jars that we had from the wedding (besides most of them are getting used for another project...).  Then I realized how many glass jars I had been saving to use in my craft room as storage for craft supplies, and knew that they could be put to perfect use for our Halloween party.

The project supply list is short and sweet:
-Glass jars (I used empty salsa, spaghetti sauce, and pickle jars)
-Orange acrylic paint
-Black permanent marker
-Wire if you want to hang them

Start by peeling off all of the jar labels and giving them a good clean.


Apply paint to the inside of the jar around the top.


Use a paint brush to spread the paint around the inside of the jar.  I tried using a brush full of paint and then painting the jar, but found the method of applying paint first to be easier.  I also found that tipping the jar upside down helped to reach the hard to get spots on right below the top of the jar.


The nice part of painting the inside is that there is no wait time between painting and drawing on the face ;)  Use a permanent marker and create spooky, scary, or happy faces for your pumpkin lanterns.  And if you run out of ideas search the internet for Jack o Lanterns and get inspiration from the faces others have cut out!


Here is my crew of pumpkin lanterns.  I love that there are different shapes and sizes and the unique look each has from the way the paint dried, the amount of paint used, and the different  faces they all have :)  I am really excited to see them lit up for the party of Friday!


Are you up to any fun holiday crafts right now?

Monday, October 8, 2012

Thrifted Kitchen Counter Table

Happy Monday!  I have a really exciting project to share that the hubby and I completed this weekend. It was a pretty relaxed weekend in the Calef house and on Saturday we stopped by a local flea market to look around.  It is one of our favorite lazy day activities, and since I wasn't feeling super great on Saturday we thought it was the perfect low key activity :)  

Within a minute of walking in I had found the counter height table I had been looking for since we moved into the house!  And it came with two stools that I desperately needed for the craft room so I looked the purchase as a win :)  $60 for all three pieces!


Since I had been looking for it since we moved in I had several inspiration pieces pinned on my Pinterest boards:

I fell in love with this island from World Market back in the spring.  They no longer carry it (sad day!), but as you can tell from the finished project it was my inspiration piece.

This beautiful furniture redo from Juniper Hill Antiques

A pretty dresser repurposed for the kitchen

This pretty island featured in Southern Living
First step was to remove the hardware from the table and proceed to sand and then clean.  After cleaning away all of the dust I sprayed the bottom a beautiful turquoise blue from Valspar.


We wanted the top to have the look of butcher block without the cost so we picked up 5 pieces of $.99 faux wood laminate.  It is the type that you just peel and stick, but we knew it wouldn't adhere the best to the curved edges so I quickly painted the edges with leftover dark brown paint from the hutch remodel.


After the paint dried we stuck the faux wood tiles in place and placed the new table into the kitchen. It brings color and functional counter space to the room :)  


Did you complete any fun DIY projects this weekend?

Wednesday, September 26, 2012

Bathroom Update

Happy Wednesday!  I am back with another room in our house to share where we have come from, what it looks like now, and what our future plans are.  This week is the bathroom, which when we moved in was a very white, but not sterile space :/  There was a single wire pantry shelf above the toilet that served as the only storage option beyond the medicine cabinet and creepy vanity.

Unfortunately I only have two very bad photos of the space before that do not show much detail (hindsight is always 20/20!), but the vanity is old and not a place I would store items beyond cleaning supplies, and the medicine cabinet was also gross with country knobs that were not my style.


The first thing we did was take down the weird wire rack (it got used when we redid our closets) and pulled off the medicine cabinet to replace it.  Someone had used the medicine cabinet to cover up a giant hole in the wall (explains why it was off-center) so we made sure to find a much larger medicine cabinet that would adequately cover the hole and caulked all the way around to create a good seal.  We also changed up the paint color to a beautiful dark grey, hung up towel racks for functionality, replaced the light, and brought in temporary shelving.


The little white cabinet outside of the door serves as more bathroom storage. It holds extra contacts, toilet paper, lotions, and hair care products.


As you can see from this shot of the temporary shelving we need more space for storage... like yesterday.


The new light is a lot brighter which is necessary in a space with only one light, and the medicine cabinet is significantly larger than the previous one.  Yay for more storage!


That is where our bathroom is currently at.  On the list of future improvements in artwork for personality, and white floating shelves that wrap around the wall beside and behind the toilet.  We hope to do two that wrap and one on the very bottom that floats just below the light switch.

Thanks for taking a peak into our bathroom!  I'll be back Friday with an easy recipe!


Wednesday, September 19, 2012

Living Room Update... Finally

We have lived in our house for almost 5 months!  I honestly cannot believe it has been that long, and when I look back at pictures of how our house first looked I am blown away.  We have done so much work to make this house our home and I am so proud of it.  I thought about doing an entire house update in one post, but then decided that I would break it up by rooms in order to show more pictures and details and make the fun last longer!

If you want to look back at all of the pictures from when we first moved in here is my initial post.

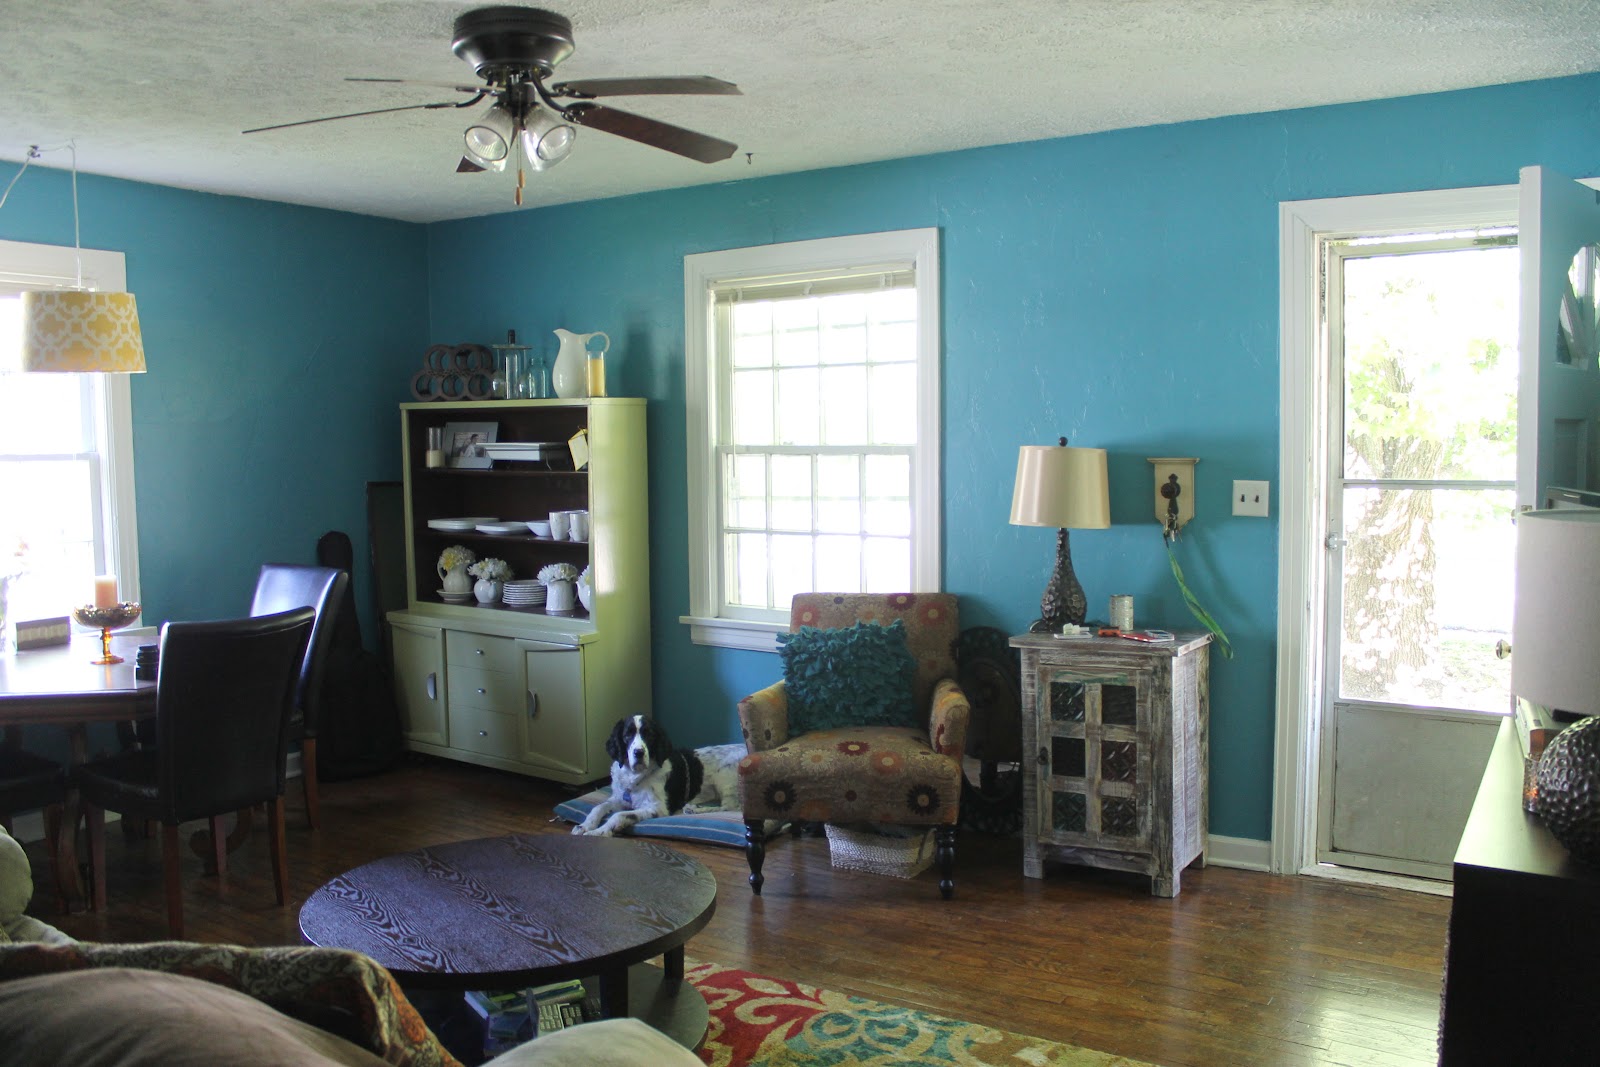
Our living room when we moved in was dark, dirty, and in need of TLC.  The walls were a dark hunter green, the trim was painted over with dark, muddy brown, the ceiling fan was brass, and the wood floors had seen better days.


We spent two weekends with my amazing in-laws working to paint the house and work on the floors.  They even came back while we were gone on vacation and polyurethaned the floors in the living room and bedrooms!  It was a long process but the end result in the living room is the perfect living space for us :)


We chose the color "Blue Lagoon" by Behr for the walls and LOVE the color as well as the paint.  It took us ONE, yes let me repeat one, coat to cover over the dark hunter green!


The floors look so much better after a good scrub and a coat of polyurethane.  If I was redoing floors in my permanent home I would have sanded, re-stained, and covered the floors with a couple of coats of poly, but this worked great to make the floors look clean, be more durable, and we were able to do all of the floors in the house with one can.


This shelf had a makeover and now acts as my "mantle".  I love it for showcasing sweet mementos during the year, and I am really excited to dress it up for holidays!


The hutch looks so good up against the blue walls!  I love how well all of the bold colors pair with one another in the space.


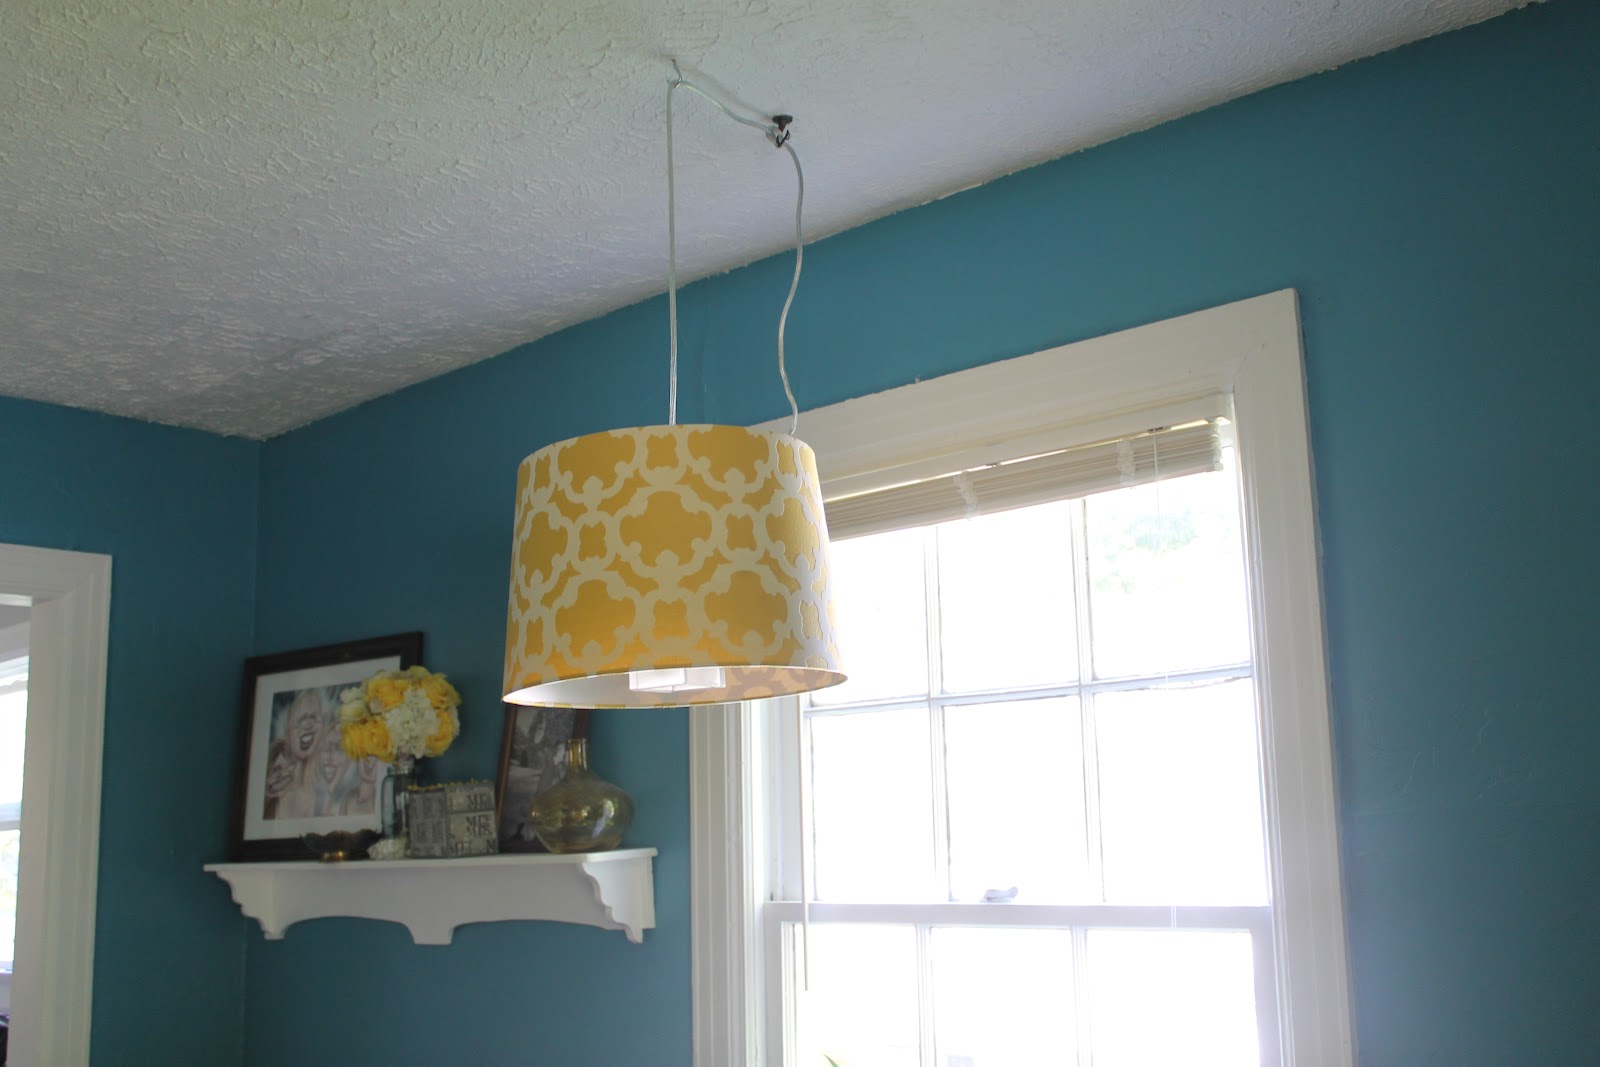
This is a lamp that we DIY'd out of a fun lampshade I had to have from Target and a pendant light from Home depot :)  It helps to define the "dining" part of the space.


It is hard to see, but behind the door we have a coat rack for purses, school bags, and jackets. You have to get a little crafty when you don't have a coat closet!


We also tackled the ceiling fan during our living room makeover.  It used to be brass, but one day we took it apart (part to paint and mostly to clean) and spray painted all of the metal parts with oil rubbed bronze.  It looks so much classier!


There is the tour of living room!  It has been a long time coming so thank you for being patient :)  There are still blank walls that I would like to have photos on, and I am still on the hunt for the perfect curtains , but it definitely looks and feels much more like home!

Followers